Creating a Terms and Conditions Agreement
This tutorial walks you through the steps to create a "Terms and Conditions" agreement in EPASS, which you can send to a Pin Pad for the customer's signature. These same steps can be applied to create other agreements or contracts as well.
Step 1 - Creating the Terms and Conditions in the Comment Table
Contracts, agreements, or any other documents that you want to send to a Pin Pad terminal for a customer to sign are added to the Comment table. Our first step is to create our Terms and Conditions agreement in this table.
-
In EPASS, go to Tools > System Maintenance.
-
Click Comment, and then click Open.

-
Click Add.

-
Enter a unique Code to identify the Terms and Conditions. For this tutorial, we're going to use TAC.

-
Click the Signature Comment checkbox, and then click the EPASS Pay Signature checkbox when it appears.

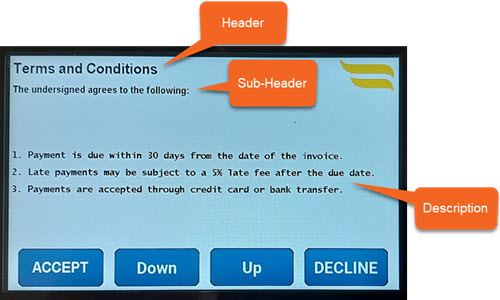
The Signature Comment checkbox adds a signature line to the comment, and the EPASS Pay Signature checkbox adds a Header and Sub-Header field.
-
In the Description field, enter the body of the Terms and Conditions.

When entering text into the Description field, to start a new line, press SHIFT + ENTER.
- The Header and the Sub-Header fields are optional. We could leave them blank, or we could use them to add titles to our Terms and Conditions.
-
We'll use the Header field as our main title, and we'll enter
Terms and Conditions. -
We'll use the Sub-Header field as an introductory statement, before the list of terms. We'll enter
The undersigned agrees to the following.
-
With the Description, Header, and Sub-Header fields filled, the layout on the payment terminal will look similar to the following:
-
In the Departments area, we'll select the Departments in our organization that can add these Terms and Conditions to an invoice.

-
Click OK to save the Terms and Conditions, and then click Exit to close the Comment window.
Step 2 - Adding the Terms and Conditions to an Invoice and Sending it to a Terminal for Signature
Now that we've created the Terms and Conditions agreement, it's ready for us to add to an invoice and send it to a payment terminal for signature.
-
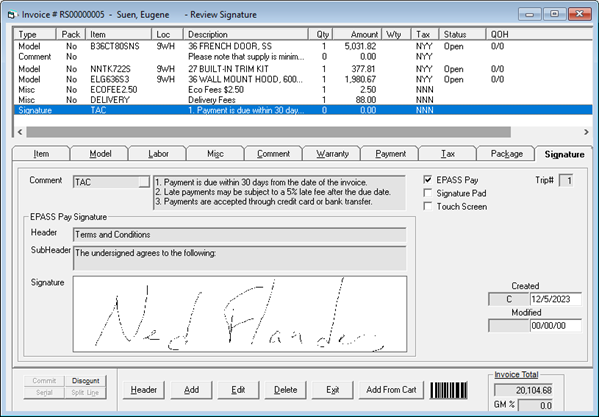
With an open invoice in Edit mode, click the Signature tab.

-
Make sure that the EPASS Pay checkbox is selected.

-
In the Comment dropdown, select Terms and Conditions (TAC). Our Terms and Conditions text is automatically entered in the Comments field, as well as the Header and Sub-Header field.

-
Make sure that the Pin Pad we want to send the agreement to for customer signing is selected in the Pin Pad dropdown. If not, we can select a Pin Pad from the dropdown.

-
Click OK.
Our Terms and Conditions agreement is sent to the Pin Pad. On the Pin Pad, the customer can scroll through and read the agreement, choose to "Agree" to it, and sign it. Once they sign it, their signature is captured in EPASS and is added to the Invoice. The Terms and Conditions, along with the customer's signature, can also be printed on the invoice.
Custom programming may be required to print signatures on your invoice.
See Also
December 5, 2023